In today’s age of smart homes and home automation, there are a plethora of devices that can help you make your life more convenient and efficient. One such device is a digital water sensor, which can help you keep track of your water consumption and prevent wastage. In this blog, we’ll take a closer look at how to install a digital water sensor, specifically the House Plant Water Sensor, in your home.
Why Install a Digital Water Sensor?
Installing a digital water sensor can help you in a number of ways. Firstly, it can give you a clear idea of how much water you are using on a daily basis. This information can help you identify areas where you can cut down on water usage and save money on your water bills. Secondly, a water sensor can help you detect leaks or other issues in your water supply system, which can prevent water damage and costly repairs.
Installing the House Plant Water Sensor
Before you start installing the House Plant Water Sensor, you’ll need to gather a few tools and materials. Here’s what you’ll need:
- The House Plant Water Sensor kit
- A screwdriver
- A wrench
- Teflon tape
- A smartphone or tablet
Once you have all the necessary tools and materials, it’s time to start the installation process. Here are the steps to follow:
Step 1: Turn off the water supply
The first thing you need to do is turn off the water supply to your home. This will prevent any water from flowing into your pipes while you are installing the sensor. To do this, locate the main shut off valve for your water supply system and turn it off.
Step 2: Locate the water meter
Next, you need to locate the water meter for your home. This is usually located near the main shut off valve. Once you’ve located the water meter, remove the cover by unscrewing the screws that hold it in place.
Step 3: Install the sensor
Now it’s time to install the House Plant Water Sensor. Start by removing the old water meter if you have one. Then, connect the sensor to the water supply pipes using the fittings included in the kit. Use Teflon tape to ensure a tight seal. Once the sensor is securely in place, turn the water supply back on.
Step 4: Connect the sensor to your smartphone or tablet
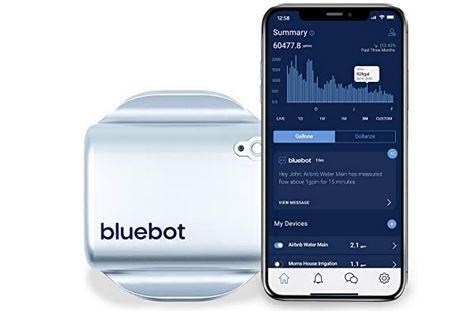
The House Plant Water Sensor is designed to connect to your smartphone or tablet so that you can monitor your water usage remotely. To do this, download the House Plant app from the App Store or Google Play. Follow the instructions in the app to connect the sensor to your device.
Step 5: Set up alerts
Finally, you need to set up alerts for your House Plant Water Sensor. This will allow you to receive notifications when there is a leak or other issue with your water supply. You can set up alerts for low water pressure, high water usage, and other custom alerts.
Conclusion
Installing a digital water sensor, such as the House Plant Water Sensor, is a simple and effective way to monitor your water usage and prevent wastage. By following the steps outlined in this blog, you can easily install the sensor in your home and start enjoying the benefits of smart home technology. Remember to regularly check the app to monitor your water usage and set up alerts to avoid any leaks or issues. Happy water conservation!